LOGGING IN AND CREATING PROFILES
Accounts (Subscriptions)
For information about our subscription options, please visit our subscription page at www.rdatoolkit.org/subscribe .
.
Account Authentication Methods (login)
RDA Toolkit offers three authentication methods to recognize and confirm that users have an active RDA Toolkit account We offer IP authentication, referring URL authentication, or account ID authentication. During the registration process each institution is given the option to choose one of these methods. The user login experience varies depending on the authentication method chosen.
IP Authentication
The most common authentication is an IP authentication. During the registration process, an institution shares its IP addresses with the RDA Toolkit staff. To provide support for off-site users, many institutions maintain a proxy server and include the IP address of this proxy server as one of their supplied IP addresses. These supplied IP addresses are entered into the institution's Secure Center (RDA Toolkit's admin system) account.
Upon arriving at RDA Toolkit on a computer with a supplied IP address, the user is automatically recognized as an active user and granted access to RDA Toolkit content.

The user's institution name is visible in the upper right section of the screen, and the user is presented with boxes labeled Profile Name and Password in the user menu. At this stage, the user has partial access to the RDA Toolkit site. To gain full access, the user must either create or login to a free user profile. For more information on profiles, see the User Profiles help section below.
Referring URL
Another account authentication method is referring URL. This method is similar to IP authentication in that the user is automatically recognized as an active user upon entering the RDA Toolkit user interface.
During the registration process, an institution places a link to RDA Toolkit on a secure page so that only users approved by the institution can access. The institution shares the URL(s) of the page or pages that contain a link to the RDA Toolkit User Interface with the RDA Toolkit staff. These URL(s) are entered into the institution's Secure Center (RDA Toolkit's admin system) account by the RDA Toolkit staff as the institution's supplied referring URL(s).
Any user following one of these links hosted by their institution is automatically recognized as an active user and granted access to RDA Toolkit content.
The user's institution name is visible in the upper right section of the screen, and the user is presented with boxes labeled Profile Name and Password in the user menu. At this stage, the user has partial access to the RDA Toolkit site. To gain full access, the user must either create or login to their free user profile. For more information on profiles see the User Profiles help section below.
Account ID
Account ID authentication for an account is offered, but it is considered to be the least user-friendly of the three authentication options. Using account ID authentication for an institutional account will require each user to login twice in order to gain full access to the RDA Toolkit site; once with an institution-wide account ID and password, and again with a separate user-specific profile name and password. For more information on profiles, see the User Profiles help section below.
During the registration process, each account is assigned an account ID and password by the RDA Toolkit staff. This login is shared by the institution with their approved users. Upon arriving at RDA Toolkit, a user is presented with boxes labeled Account ID and Password in the user menu.

Upon entering an account ID and password and clicking the Login button  or pressing enter on the keyboard, the screen refreshes, as shown below.
If the authentication was successful, the user's institution name is visible in the upper right section of the screen, and the user is presented with boxes labeled Profile Name and Password in the user menu. At this stage, the user has partial access to RDA Toolkit content.
No-IP login
We offer one more login method for those who find themsleves in a unusal situation. When a user is visitng another institution with an RDA Toolkit account the user may find that because of IP authentication, any login is going directly to the institution account that the user is visiting. So how can a user avoid an unwanted IP authentication and still login to her/his account? The user can avoid the IP authentication by simply navigating to http://access.rdatoolkit.org/login.
User Profiles
User profiles allow individual users to be recognized by RDA Toolkit. Profiles are required if users want to set preferences, save searches, and to create, save, and share workflows and bookmarks on RDA Toolkit.
User profiles can be confusing to new users, and profile logins are often confused with account authentication methods. On RDA Toolkit, a profile name login is displayed only after the user has been authenticated with an active account via one of our three authentication methods: account ID, IP address, or referring URL.
All accounts have a set number of concurrent users based on their subscription, but all accounts are allowed an unlimited number of user profiles.
Creating a Profile
When users are authenticated to an active account, they have partial access to RDA Toolkit. To gain full, access users must either create or login to a free user profile.
Users can create their own profile by clicking the Create button  in the user menu above.
The create profile dialog box below displays.
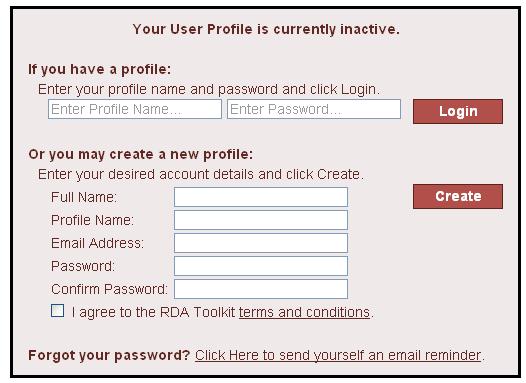
Please fill in all of the fields on the form.
| Full Name: | Enter the name that will be displayed in the upper right corner of the RDA Toolkit user interface. |
| User Name: | Select a profile name and enter it here. This will be your profile name used to login to your profile. |
| Email Address: | Fill in a current active email address so that the system can email you a password reminder upon your request. |
| Password: | Select your own password and enter it here. This will be your profile password used to login to your profile. |
| Confirm Password: | Type your password again to ensure accuracy. |
Next, check the "I agree to the RDA Toolkit terms and conditions." box. To read the terms and conditions, click the Terms and Conditions link. The text will appear in a new window. This window can be printed using the print function of your browser.
After completing the form and clicking Create, you will be logged into your new profile. Profiles can also be created by subscription administrators. See the Administration System help section for details on this procedure.
Logging into a Profile
Once a user has been authenticated to an active account, a user is presented with boxes labeled Profile Name and Password in the user menu.
Upon entering a profile name and password and clicking the Login button or pressing enter on the keyboard, the screen refreshes, as shown below.

If the login was successful, the user will see in the upper right corner of the screen the text "Welcome, [Full Name]" with their institution name below (if supplied). The login boxes will be replaced with My Profile  , Support
  , and Logout buttons
  . The user now has full access to RDA Toolkit.
Managing a Profile
Users can update their profile information by clicking the My Profile button in the user menu.
Clicking the link opens the Manage Profile page, as shown below.
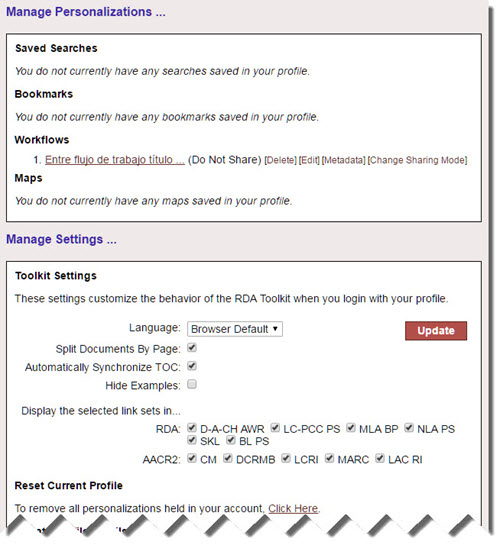
Users can type new profile information and complete the update by clicking the Update button.
The Toolkit Settings section allows users to set preferences for RDA Toolkit features. The first option allows users to select their language preference for RDA Toolkit. Users may select between English, Finnish, French, German, Italian, and Spanish. Users may also select "Browser Default", which takes the language setting from that associated with your browser. "Browser Default" is the default language setting. If your browser language setting is not English, Finnish, French, German, Italian, and Spanish, then the English language version will display when "Browser Default" is selected.
The next three options allow users to choose to split documents into pages, automatically synchronize the browse table of contents (TOC) with the text you are viewing, or hide examples in the RDA text. Splitting a document into pages allows for faster loading times and better site performance. This feature is turned on by default. Automatically synching the TOC allows users to more easily identify their location within a large document. The automatic synch will change whenever you click a link within RDA Toolkit, but it will not adjust to scrolling. Hiding the examples allows the user to scroll more quickly through the content. The Hide Examples feature is turned off by default.
The next option in Toolkit Settings allows users to choose which link sets to display in either RDA or AACR2. Currently users can choose to display Anwendungsrichtlinien für den deutschsprachigen Raum (D-A-CH AWR), British Library Policy Statements (BLPS), LC-PCC Policy Statements (LC-PCC PS), Music Library Assoiciation Best Practices (MLA BP), National Library of Australia Policy Statements (NLA PS) or Suomalaisten kirjastojen linjaukset (SKL) in RDA by checking the appropriate box. In AACR2 users can choose to display links to resources found on Cataloger’s Desktop--Cartographic Materials (CM), Descriptive Cataloging of Rare Materials-Books (DCRMB), Library of Congress Rule Interpretations (LCRI), and MARC--or links to Library and Archives Canada Rule Interpretations (LAC RI), found on the LAC website. The default setting is for all the link sets to display. To suppress the display of a link set, simply uncheck the appropriate box in the Toolkit settings.
Master Profiles
In April 2016 we added a Master Profile feature to allow staff managers to set RDA Toolkit preferences for any users of their account. The Master Profile uses the same interface as the personal profile page to allow the profile owner to set the language preference; choose whether to hide examples, split documents by page, etc.; and determine which sets of links will display in the RDA text.
Set Up the Master Profile
After logging into RDA Toolkit, click on the Create Profile icon . Next, complete the profile form using "Master" as both the Full Name and the Profile Name. Be sure to provide a password and email address and check the terms and conditions agreement. Click Create.
Set Your Preferences
Log into the Master Profile using "Master" as your profile name and your password. Make your selections and click the Update button. The preferences set in the Master profile will become the default settings for anyone logging into your account. Any users wishing to override the Master settings will need to log into their personal profiles.

Email Password 
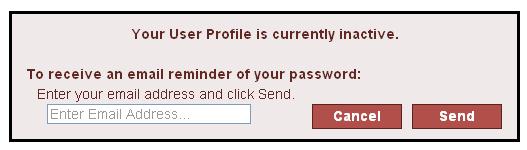
If you ever forget your password for your user profile password, simply click the Email Password button .
The following dialog box will display. Enter the email address associated with your profile and click Send. Your address will be immediately emailed to you.